Tag Archives: Dark Times

REVIEW: Star Wars: Dark Times – A Spark Remains #3

Dass Jennir has recruited another Jedi-in-hiding to his cause, but his new potential ally reveals a traitor in their midst, and now Darth Vader is on their trail.

In Star Wars: Dark Times – A Spark Remains #3 (DarkHorse.com profile), Kai Hudorra and Dass Jennir team up to confront the insectoid Jedi Beyghor Sahdett, who has been working for the Emperor all along. Can two Jedi handle one of their former comrades, one of the better swordsmen of the order, before the violence spills over to the rest of the Uhumele crew? Spoilers ahead as we review this issue, written by Randy Stradley.

Summary: With Hudorra unmasking Sahdett as a traitor, Bomo Greenbark is again enraged that Jennir has been keeping secrets from him, leaving him unarmed in this dangerous situation. With H2 giving Hudorra a new lightsaber, the battle between the two Jedi against their former brother-in-arms begins in Hudorra’s office, but then Sahdett self-defenestrates into the casino below. The Jedi try to catch up, and Hudorra gets knocked out of the fight, and quickly beats Jennir to the ground. Mezgraf and Ko Vakier attempt to join the fight, but Sahdett lops off the Togorian’s barstool-wielding hand and then kills the Blood Carver. The casino guards attempt to corner the Verpine Jedi, but after he kills one, they back off.

Having ridden H2 down through the window, Bomo arrives and uses his mouth flash ability to temporarily blind the combatants, pulls a blaster from a guard and starts shooting at Sahdett. Distracted by Bomo’s attack, Sahdett is stabbed by Jennir, and then Force-pushed into a wall by Hudorra.

On Coruscant, assassin Falco Sang has begun upgrading his ship when he received some unexpected mechanic’s advice from Darth Vader, who also leaves him with assistant droid. Lt. Gregg gets a late night call from the Emperor and reports to Darth Vader that Dass Jennir has been located – a tip sent in by Sahdett to his master, and Vader and Gregg prepare to chase him down.

Knowing that Vader is likely coming, Hudorra calls for the casino’s evacuation, and the two Jedi interrogate their prisoner. Sahdett reveals how he came to join the Emperor, after seeing the Emperor’s power and deciding to turn on the Jedi. As he makes a final plea for his captors to serve the Emperor, Sahdett is stuck down by Master Hudorra.
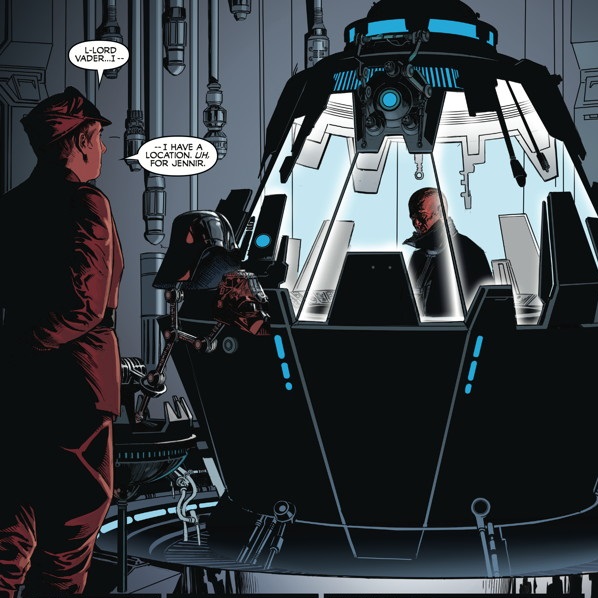
Panel from Dark Times: A Spark Remains #3

Review: While the main action is the massive melee between Sahdeet and everyone else, there is also a lot of other stuff going on in this issue. We get to see an unexpected side of Darth Vader as the Anakin-who-likes-to-tinker-with-machines, giving some knowhow to Falco Sang, helping to bring their relationship to being less antagonistic, as well as giving Sang a new taste of the perks of cooperating with the Empire, instead of working outside of it. We also get to see Vader in his meditation chamber, with Gregg intruding on the Dark Lord’s me time. 

Lots of little details – As a Verpine, Sahdett has always been an anomaly with his dragonfly-ish wings, and while one fell off at the end of last issue, the rest finally are lost, but not after a little aerial combat to give himself and his lightsaber an advantage in Hudorra’s office. Plus most of the Uhumele crew makes an appearance in the issue, though most are relegated to the sidelines – and they lose another crew member. The battle action is well presented, and we get to see Force powers being used in battle, something we don’t get very often in comics (sometimes hard to depict with still images).

Douglas Wheatley handles the art, with Dan Jackson providing the colors and Michael Heisler with the lettering, and this issue of Dark Times is a treat for the eyes. The lightsaber battle crackles with excitement and some cool light and color effects are used to pull the focus on Jennir slowly weakening under Sahdeet’s strength with the saber, and with the Force throwing action and of course, Bomo’s Nosaurian flash ability. We also get some great panels with a darker grittier tone as the captive Sahdeet flashes back to how he and several other Jedi encountered the Emperor, and how Sahdeet chose to survive by killing a fellow Jedi, after the Emperor demonstrated his own abilities in rapidly cutting down some Jedi combatants. Overall, lots of great art to accompany this very satisfying installment of Dark Times.

Benjamin Carre does the cover, and at first the Michael Jackson uniform costume on Dass seems incongruous, but it all makes sense, without spoiling the plot. 

In the end, this was a middle issue of a five issue arc, and it didn’t feel connector-y at all! Full of plot developments and lots of action, and some neat insight into why a Jedi would join the Emperor – and how Jedi deal with their own! Big thumbs up!

REVIEW: Star Wars: Dark Times – A Spark Remains #2

Jedi Dass Jennir needs to rope another Jedi into a scheme to take out Vader, but can he force someone into a decision that he himself didn’t want to have to face?

The second issue of Star Wars: Dark Times – A Spark Remains (DarkHorse.com profile) brings Dass Jennir into greater conflict with himself, his friends aboard the Uhumele, and even his best friend, Bomo Greenbark. It issue came out on August 21, so you can go get it now – and get it you should! Spoilers ahead!

Summary: Dass Jennir and the Uhumele crew have been scouring planets, looking for a third Jedi to help tip the balance in the insectoid Jedi Sahdett’s plan to kill Darth Vader. After failing to turn up leads but restocking on supplies at Rion, the crew has a feast. Dass is distracted by Ratty’s success at clandestinely getting some supplies for him, and misses some romantic cues from Ember, and draws suspicion from Bomo. Meanwhile, on Coruscant, the Emperor snoops on Lt. Gregg’s task of tracking Jedi leads for Vader, and Gregg has a new strategy for dealing with Falco Sang: trying to show that they have a common goal: getting Dass Jennir. Gregg returns Sang’s ship, and Sang tries to impress Vader by rushing him in the hangar. Vader is impressed, and has Sang work on maintaining his ship.

Aboard the Uhumele, Dass picks up the item that Ratty has secretly built for him, but Bomo catches Dass in the corridor, and demands to be let in on the secret. Unable to convince Bomo without telling him what is going on, Dass uses a Jedi mind trick to make his friend forget the conversation. The ship arrives at Kestaval, where the crew wears Ember’s elaborate tailorings, and makes their way to the Lucky Twi’lek, a lavish casino reachable only via a long cliffside road. The casino’s owner (and Jedi-in-hiding), Master Hudorra, grudgingly agrees to meet with Sahdeet and Jennir, but Greenback pushes himself into their private discussion, while the rest of the crew is given free run of the casino’s hospitality. Sahdeet explains the plan to trap Vader, but Hudorra finds that something is not right…

Review: And I’m not going to spoil what Hudorra senses, except to say that Bomo is also surprised by this. Besides the revelation at the end, we get a lot of good story in this comic, and a little bit of action: Falco Sang jumps Vader aboard his ship, and manages to knock the Dark Lord down and strike him with a tool or part before Vader decides the fight is over. But mostly, we get Dass Jennir, former Jedi, trying to figure out how to be a boyfriend, and how to keep his own plan on a ship where plans are made jointly – and Bomo, burned in the past by Dass making decisions for him, is righteously nosy. Also, tying up some loose ends from the previous arc, H2 is repaired… and is now pink. Is Bomo’s desire to be part of the loop going to cause problems with Dass? Like Willow erasing parts of Tara’s memory on Buffy the Vampire Slayer, Dass has crossed a line of trust with his friend – and I’m sure this will be a bad thing in the end. Randy Stradley has built up these characters well – I liked how Gregg, working late, assumes a comm call is one of his subordinates, but has to backtrack when it is actually the Emperor on the holo.

Douglas Wheatley does some fantastic art in this issue – I really liked seeing the crew of the Uhumele in their finery as they visit the Lucky Twi’lek in style, and Master Hudorra and his entourage are likewise well presented. There’s a small panel of Bomo gawking at an ornate but massive set of armor as they enter Hudorra’s office, emphasizing that Bomo is both figuratively and literally just a little guy in the bigger picture. Dan Jackson adds great colors to all the scenes, with Captain Heren and the crew nice and vivid on the tropical world Rion (the planet won’t always be so lush). Bomo has some great facial expressions throughout – looking pensive, pained, enraged (with teeth out), and more. Plus the return of the Nosaurian mouth flash, although perhaps a recap explanation of that might have been nice.

The cover by Benjamin Carré catches that scene as well – Dass on alert, being blinded by the inside of Bomo’s mouth. A good way to pull some mystery and suspense into the same shot, while focusing on Dass Jennir, and giving more light that just the spark that remains.

Overall, a good issue that brings us closer to what we saw in forecast in the first issue: we’re at the place where the ambush against Vader happens, and learn how it would be a great trap point. But first, there’s something else that our heroes need to take care of!